Hostinger Hosting Setup Guide 2025:- Launching a website in 2025 is simpler than ever, but success lies in choosing the right hosting platform and configuring it the right way. Among many hosting providers, Hostinger stands out as a popular, affordable, and performance-driven solution—especially for beginners and small to medium-sized businesses. This guide is your in-depth walkthrough to setting up your website with Hostinger, step by step, with real-world insights and zero fluff.
Why Choose Hostinger in 2025?
In a crowded web hosting market, Hostinger continues to shine thanks to its blend of speed, ease of use, and competitive pricing. Here’s why thousands of users globally trust Hostinger:
- Optimized for WordPress and other CMS platforms
- Intuitive hPanel (Hostinger’s custom control panel)
- Fast servers with global data centers
- Free domain and SSL in most plans
- 24/7 customer support via live chat
- Excellent uptime track record
It’s especially appealing to entrepreneurs, bloggers, freelancers, and small business owners who want a reliable website without the hassle of complex server management
Step-by-Step Hostinger Setup Guide (2025)
Step 1: Create Your Hostinger Account
- Visit the official Hostinger website.
- Choose a plan (Single, Premium, or Business Web Hosting):
- Single Plan: Ideal for one simple site.
- Premium Plan: Best for multiple websites with more features.
- Business Plan: Suitable for eCommerce or growing sites.
- Enter your email address or sign up with Google.
- Choose a billing cycle: 1 month, 12 months, 24 months, or 48 months.
- Complete the payment through your preferred method.
Step 2: Register a Domain Name
Many of Hostinger’s hosting packages include a complimentary domain name for the first year at no extra cost. If your plan includes one:
- Enter your desired domain during checkout or via the dashboard.
- Choose a domain name that clearly represents your brand and is simple for visitors to recall.
- Complete the domain registration and verify your email to activate it.
If you already own a domain, you can connect it later using Hostinger’s DNS settings.
Step 3: Set Up Your Hosting Environment

After registration:
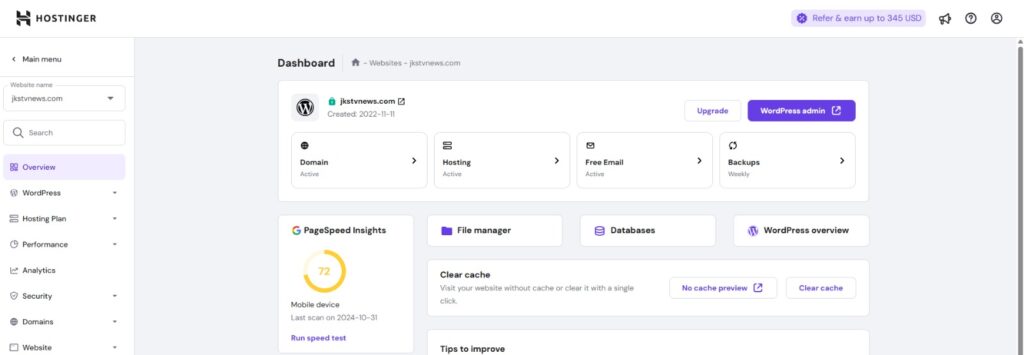
- Log into your Hostinger dashboard (hPanel).
- Select the hosting plan you just purchased.
- Use the Auto Installer to set up WordPress, Joomla, or any CMS:
- WordPress is recommended for most users.
- Fill in your website name, admin username, and password.
- Click install.
In under 5 minutes, your CMS is live and ready to customize.
Step 4: Connect Your Domain
If you purchased your domain through Hostinger, it will be automatically linked to your hosting account.
If your domain is from another provider (like GoDaddy or Namecheap):
- Go to your domain registrar.
- Update the nameservers to Hostinger’s:
- ns1.dns-parking.com
- ns2.dns-parking.com
- Allow 24 to 48 hours for full DNS propagation.
Step 5: Secure Your Website
Security is essential from day one. Here’s how to lock your site down:

- Activate the included SSL certificate through your Hostinger control panel to secure your site.
- Force HTTPS to ensure encrypted traffic.
- Install a security plugin like Wordfence (for WordPress).
- Set strong admin passwords and limit login attempts.
- Enable two-factor authentication if possible.
Step 6: Set Up Email Accounts
With Premium or Business plans, Hostinger includes free email hosting:
- Go to the Emails section in hPanel.
- Create custom emails like info@yourdomain.com.
- Use webmail or connect to Gmail/Outlook.
This adds professionalism and credibility to your website.
Step 7: Optimize Website Performance
Speed affects both SEO and user experience. Optimize your site with:
- LiteSpeed Cache Plugin (included with Hostinger)
- Minified CSS and JS files
- Optimized images using tools like TinyPNG
- A CDN like Cloudflare (also available via hPanel)
Regular speed checks using GTmetrix or Google PageSpeed Insights can help identify bottlenecks.
Step 8: Create Regular Backups
Hostinger offers automated weekly backups, but you can also:
- Manually back up files and databases via hPanel
- Set up automated backups using tools such as UpdraftPlus to ensure regular data protection.
- Save your backup files to cloud storage platforms like Google Drive or Dropbox for easy access and safety.
Read Also:- AdSense Approval Trick 2025: The Easiest Way to Get Fast Approval
Backups are your insurance policy against hacking, errors, or accidental deletions.
Step 9: Monitor and Grow Your Website
Once your site is live:

- Connect Google Analytics for traffic tracking
- Submit your site to Google Search Console
- Monitor uptime with tools like Uptime Robot
- Update content regularly for SEO growth
As your website grows, you can upgrade your plan or switch to Hostinger’s cloud or VPS hosting for better resources.
Final Thoughts
Setting up a website with Hostinger in 2025 is not just easy—it’s smart. From automated installations to built-in performance tools and responsive support, Hostinger empowers you to launch with confidence. But success doesn’t stop at going live; maintaining speed, security, and fresh content is key.
If you’re planning to start a website this year, Hostinger is a reliable partner that delivers professional-grade hosting without the complexity. Follow this guide carefully, and you’ll be well on your way to building a strong, scalable digital presence.